
SCIM Provisioning
Nirmata Control Hub supports SCIM 2.0 (System for Cross-domain Identity Management) for automatic user lifecycle management. Once configured, users are automatically provisioned and deprovisioned in NCH as they are added or removed in your Identity Provider — eliminating manual user management.
This guide covers configuration with Azure AD (Microsoft Entra ID).
Prerequisites
- Admin access to Nirmata Control Hub
- SAML SSO already configured for your Azure AD application
- A Nirmata API key — see API Keys for how to generate one
- Admin access to your Azure AD / Microsoft Entra ID tenant
Step 1: Configure Admin Credentials in Azure AD
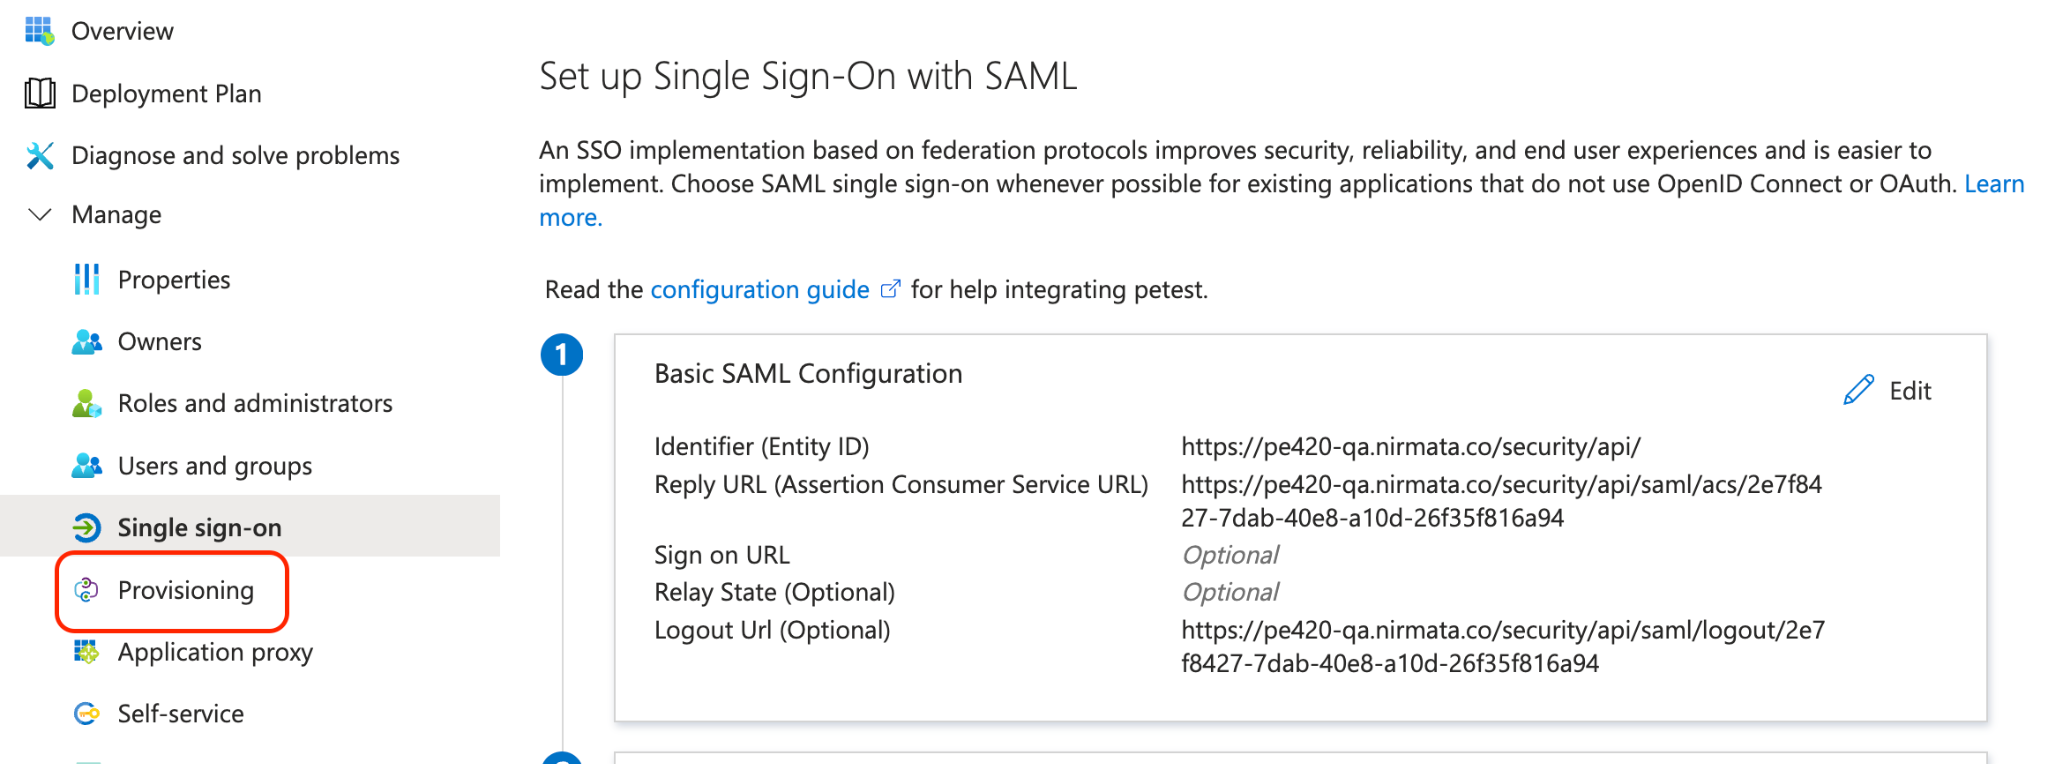
In the Azure portal, open your Azure AD enterprise application and click Provisioning in the left sidebar.
Set Provisioning Mode to Automatic.
Under Admin Credentials, fill in the following:
Field Value Tenant URL https://<your-nirmata-domain>/users/api/scim/v2Secret Token Your Nirmata API key 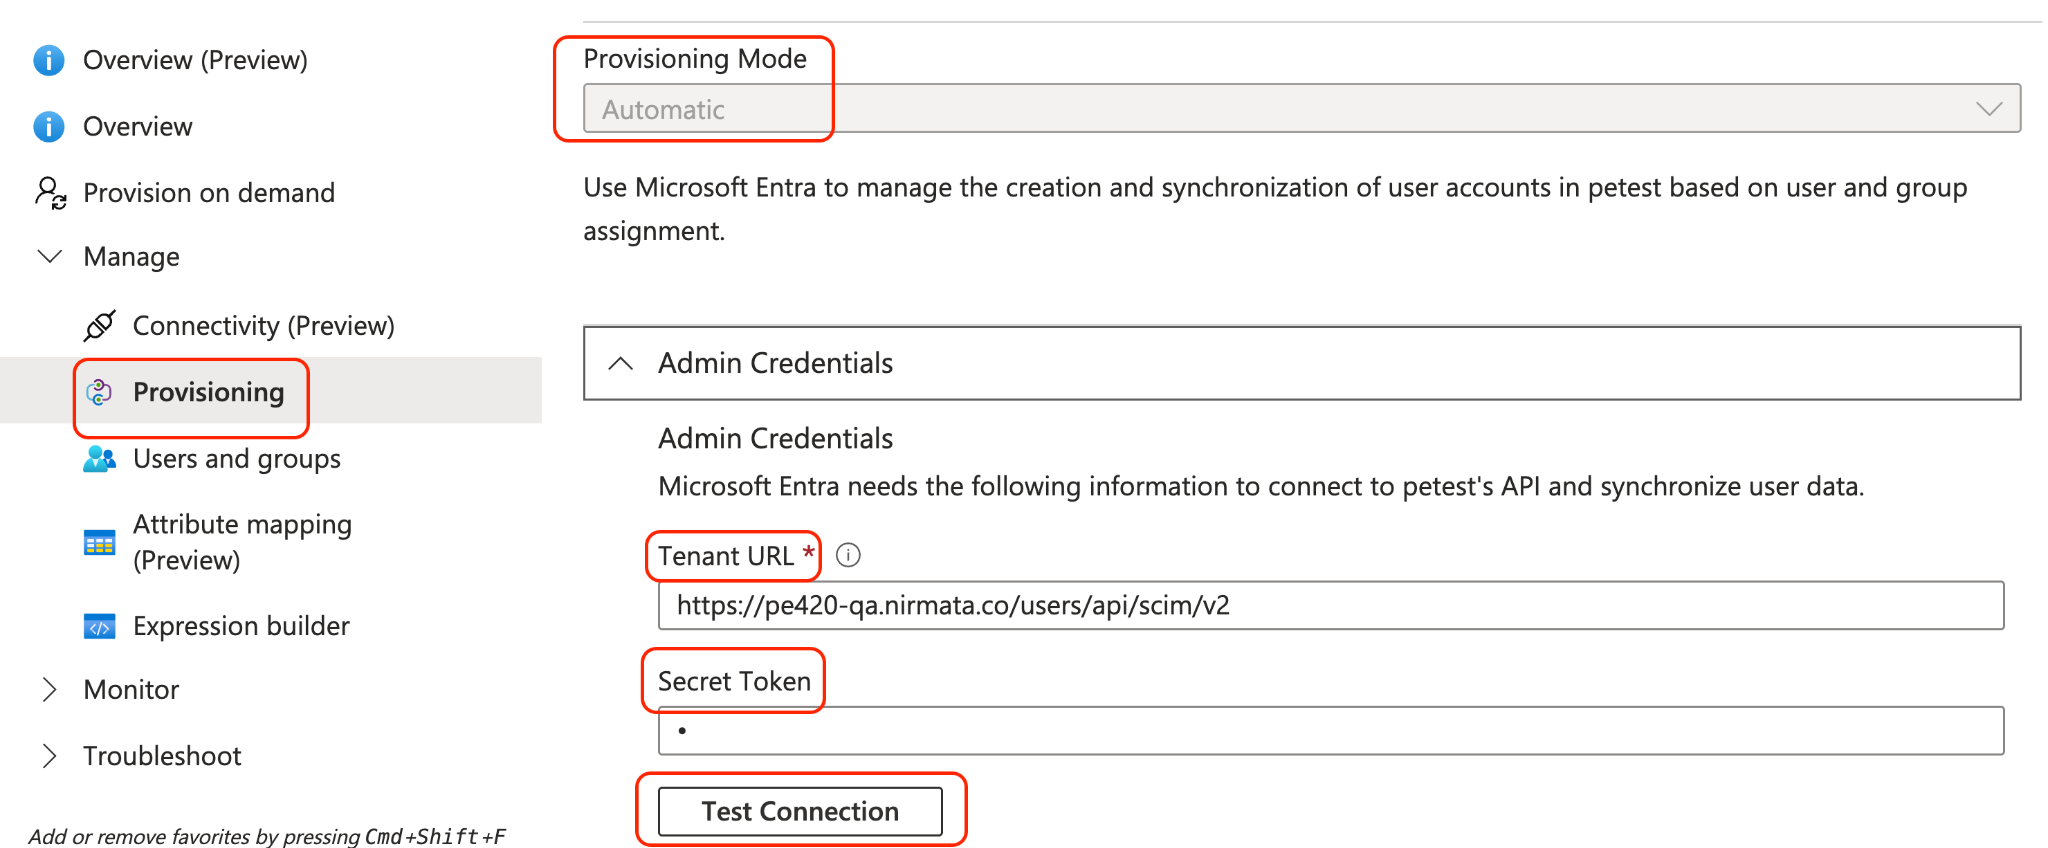
Click Test Connection. A green checkmark confirms the credentials are valid.
Click Save.
Step 2: Configure App Roles (Optional — for Admin Access)
The default role assigned to auto-provisioned users in NCH is devops. To assign the admin role to a group, you must first create an admin app role in Azure AD.
Note: Users assigned the admin role will initially be provisioned with the devops role. The role automatically changes to admin the first time they log in to NCH.
Create the Admin App Role
In the Azure portal, go to App registrations and open your application.
Under Manage, click App roles.
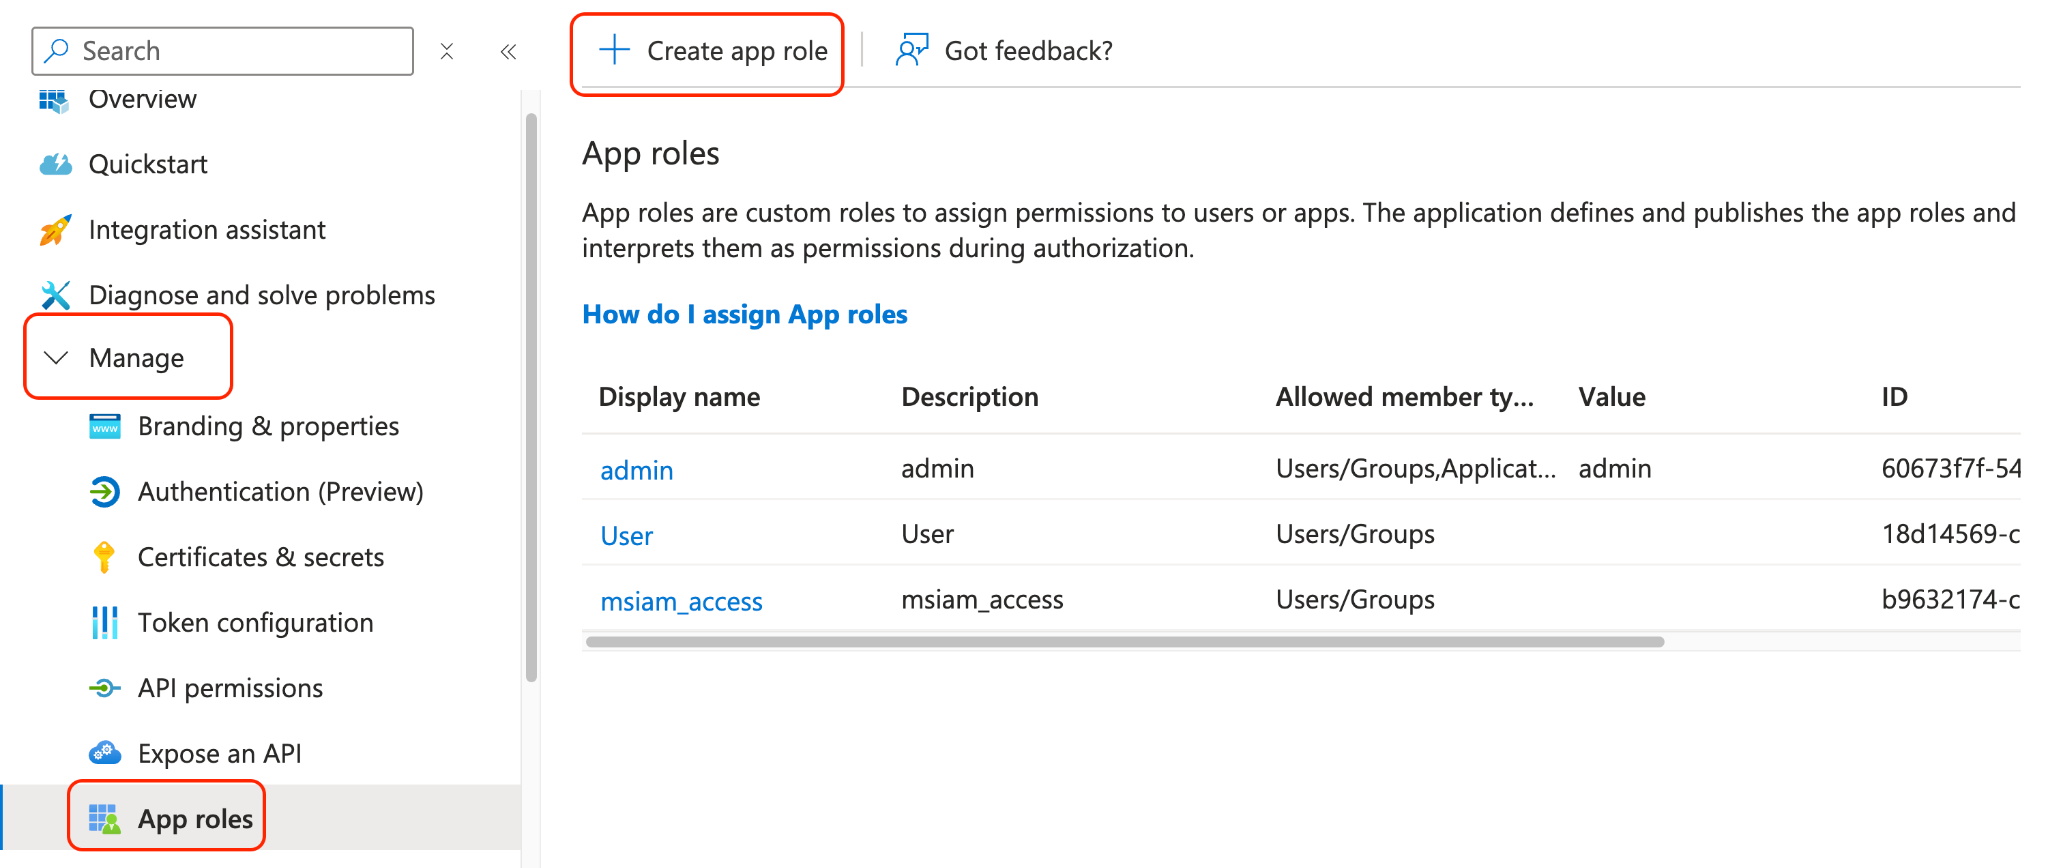
Click + Create app role and fill in the fields:
Field Value Display name adminAllowed member types Both (Users/Groups + Applications) Value adminDescription adminEnable this app role Checked 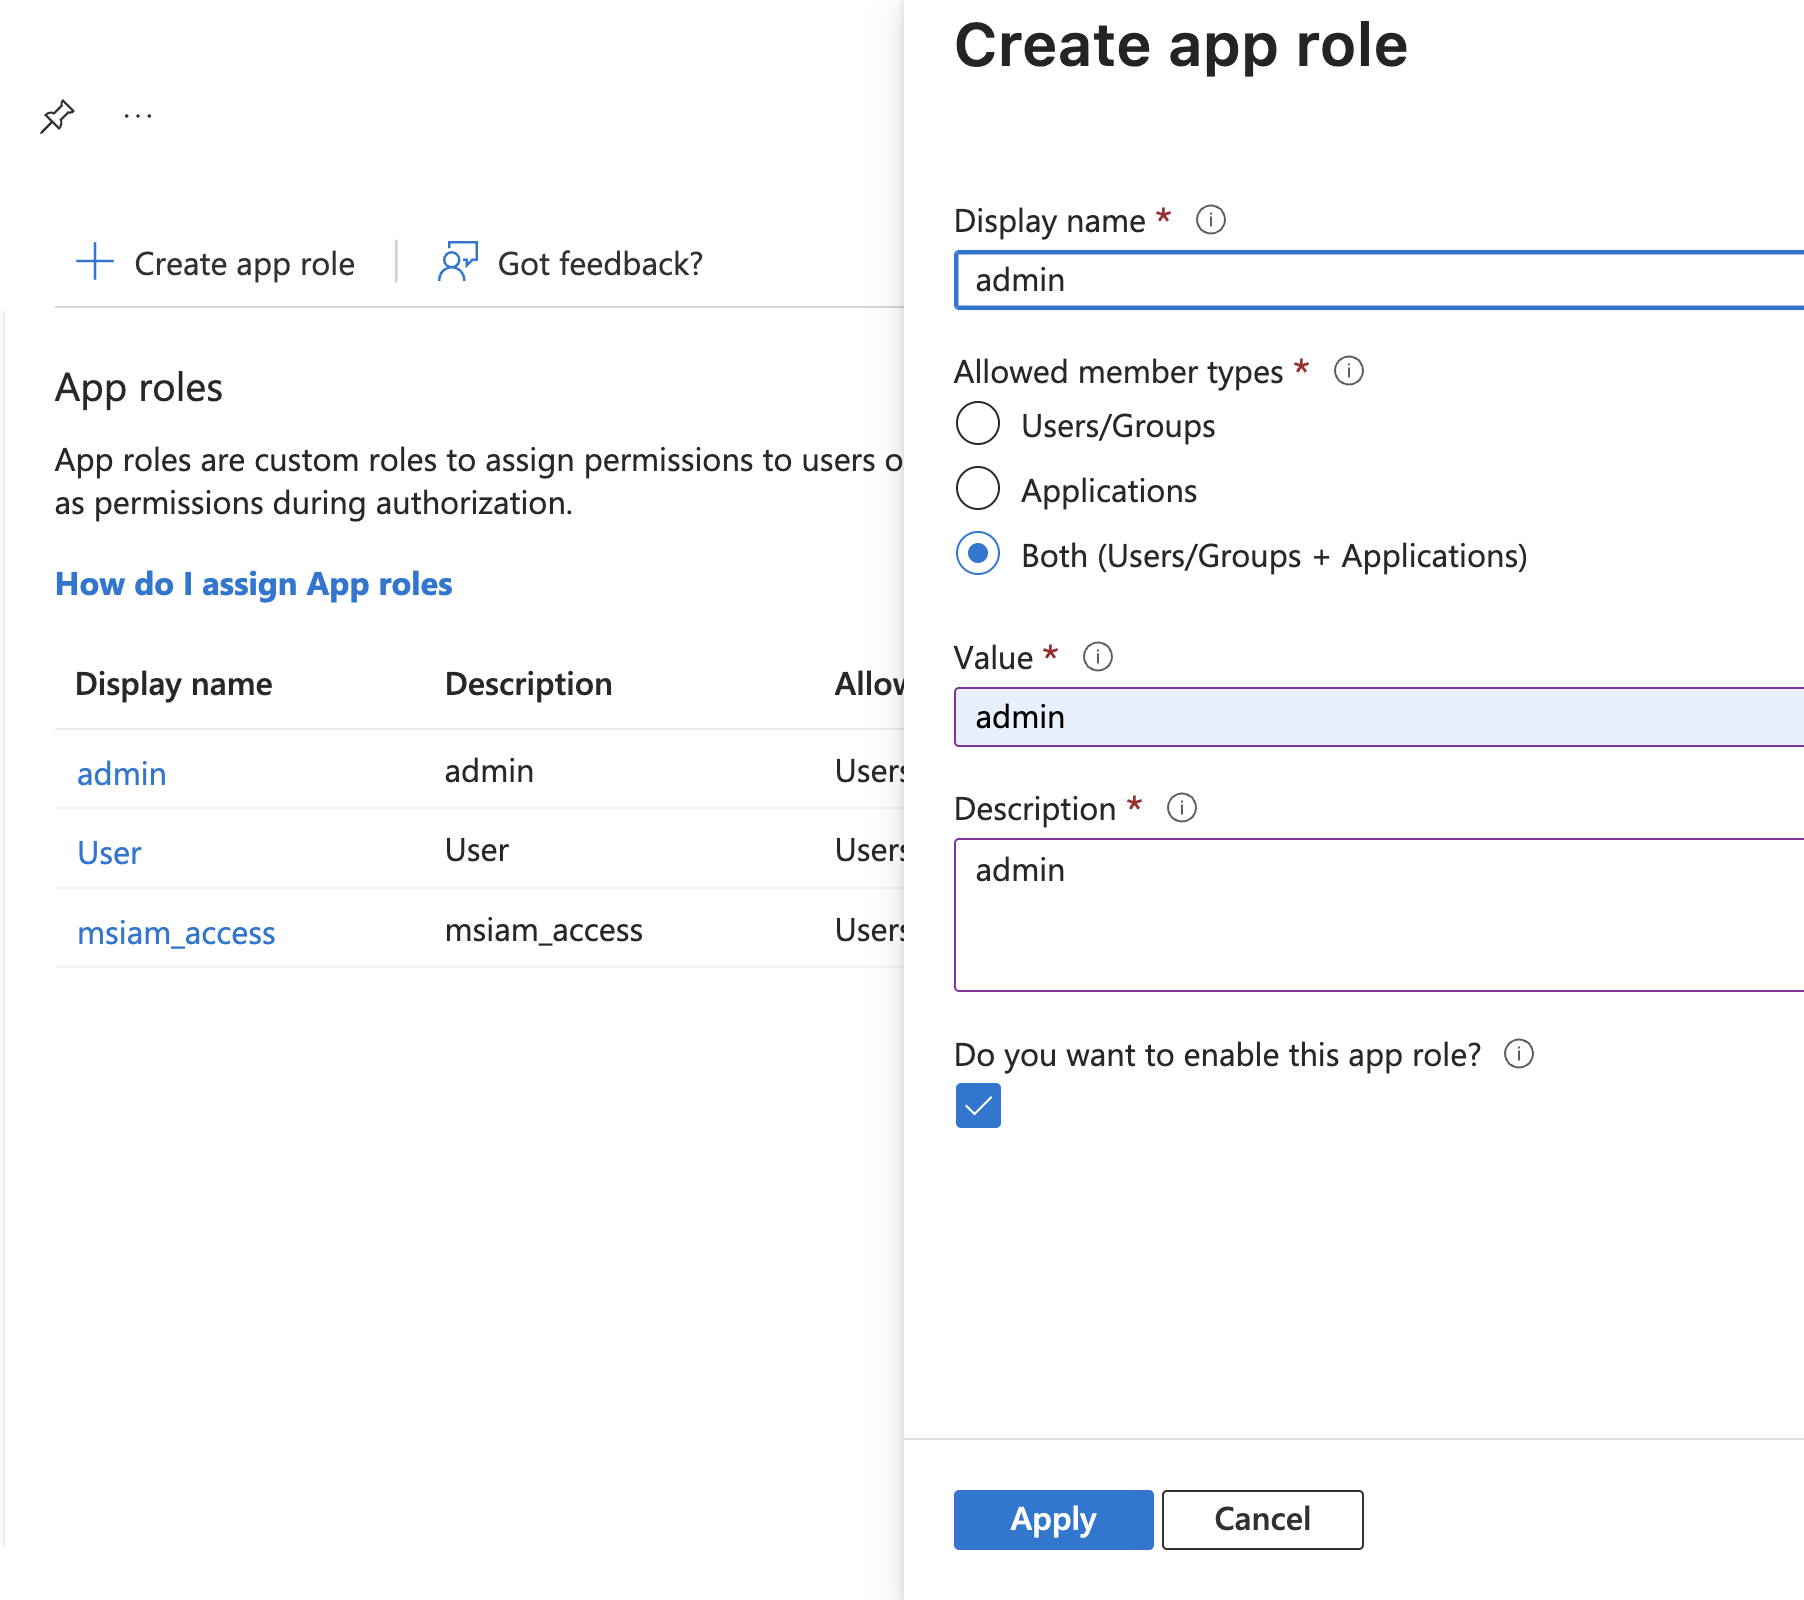
Click Apply.
Assign the Role to a Group
- Go back to your Azure AD enterprise application (not App registrations).
- Under Manage, click Users and groups.
- Click + Add user/group, select the group you want to grant admin access to, and assign the admin role created above.
- Click Assign.
Step 3: Start Provisioning
- In your Azure AD enterprise application, go to Provisioning.
- Click Start provisioning.
Azure AD will now synchronize users and groups automatically. The provisioning cycle runs every 40 minutes.