Automatic User Provisioning
Automatic User Provisioning is the automatic syncing of users and teams in the Nirmata Policy Manager when provisioned from Azure Active Directory. This requires creating an enterprise application in the Active Directory and setting up the Nirmata Policy Manager (NPM) with it. Refer to the official Azure docs for more information on creating and managing Enterprise Applications.
Setting up NPM in Active Directory
To create an enterprise application and set up NPM in the Azure Active Directory:
- Log into the Azure portal with your account credentials. Then, go to Home>Microsoft Entra ID. Enterprise applications and groups can be created from here.
- Click on Enterprise applications under Manage to view the list of all enterprise applications associated with your organization.
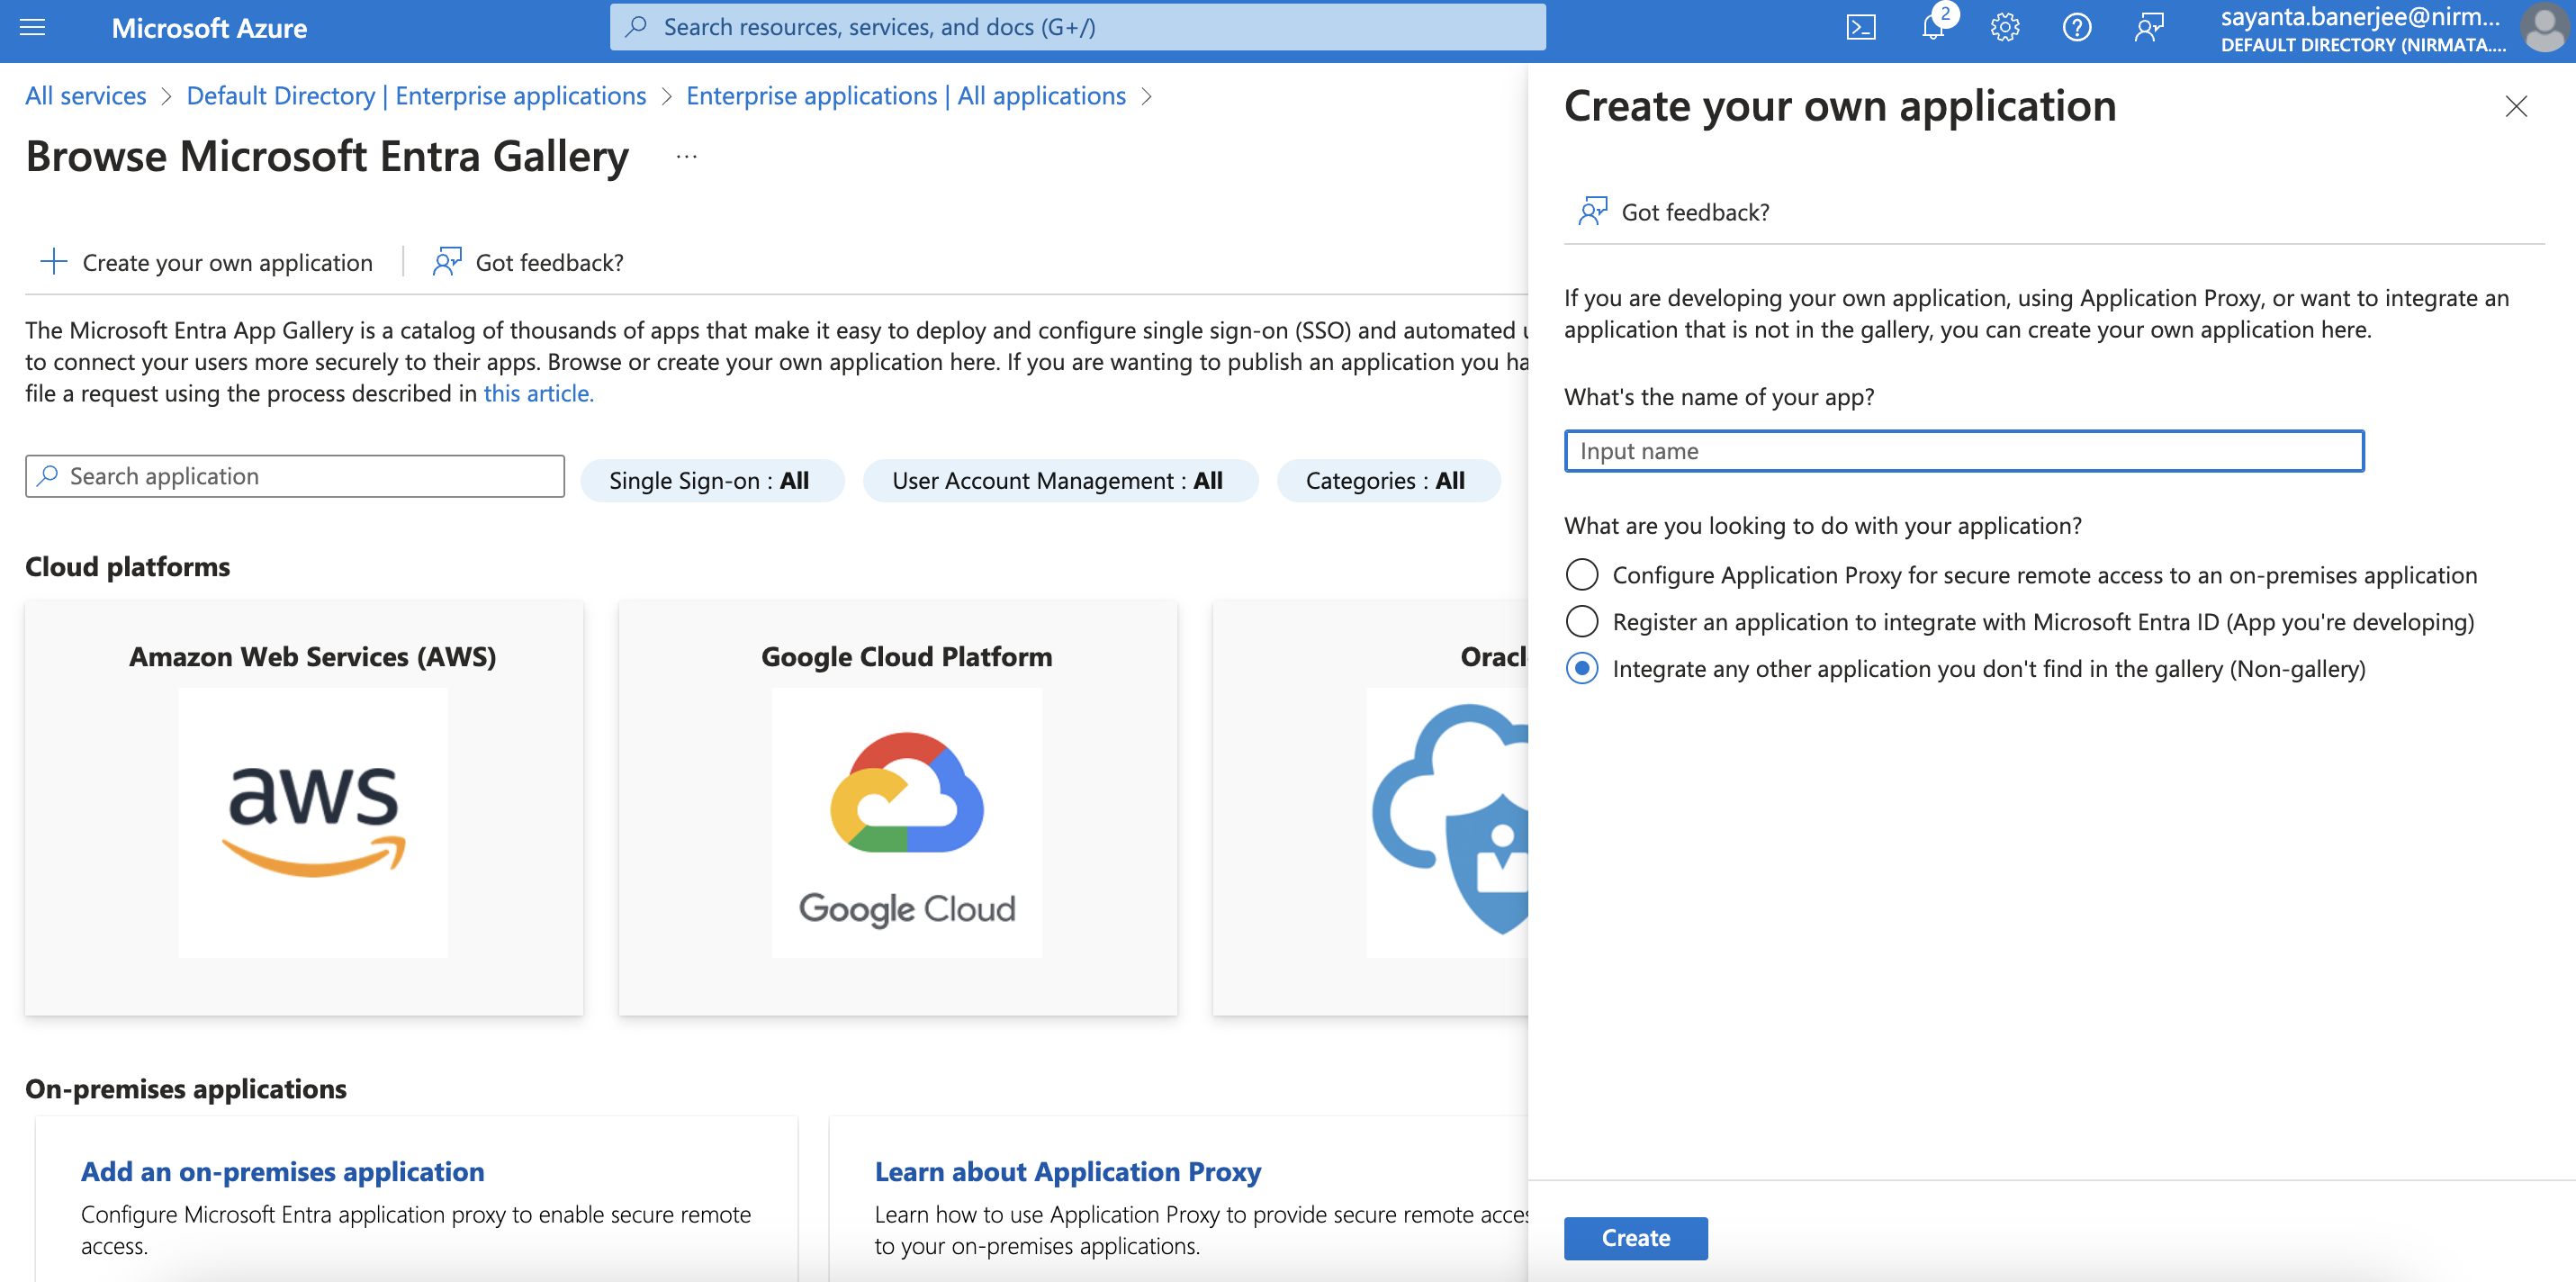
- Create a new application by clicking on the New application button. This opens the Microsoft Entra App Gallery, which is a catalogue consisting of applications and cloud platforms that make it easy to deploy and configure single sign-on (SSO) and automated user provisioning.
- Click on Create your own application to create and integrate your application with the Nirmata Policy Manager. Give an application name and click on create. This will create the application and the page lists out the important properties of the application like Name, Application ID, and Object ID.
-
Next, click on the Provision User Accounts tile and click on the Get Started button to integrate the application with Nirmata Policy Manager. To do so:
a. Select the Provisioning Mode as Automatic from the dropdown.
b. After that, fill out the Tenant URL with the NPM URL (https://nirmata.io/users/api/scim/v2) and Secret Token with the API key found in the NPM profile.
c. Next, click on the Test connection button which will return with a success message when the connection gets established.
d. Finally, click on Save to save the configuration settings and complete the integration.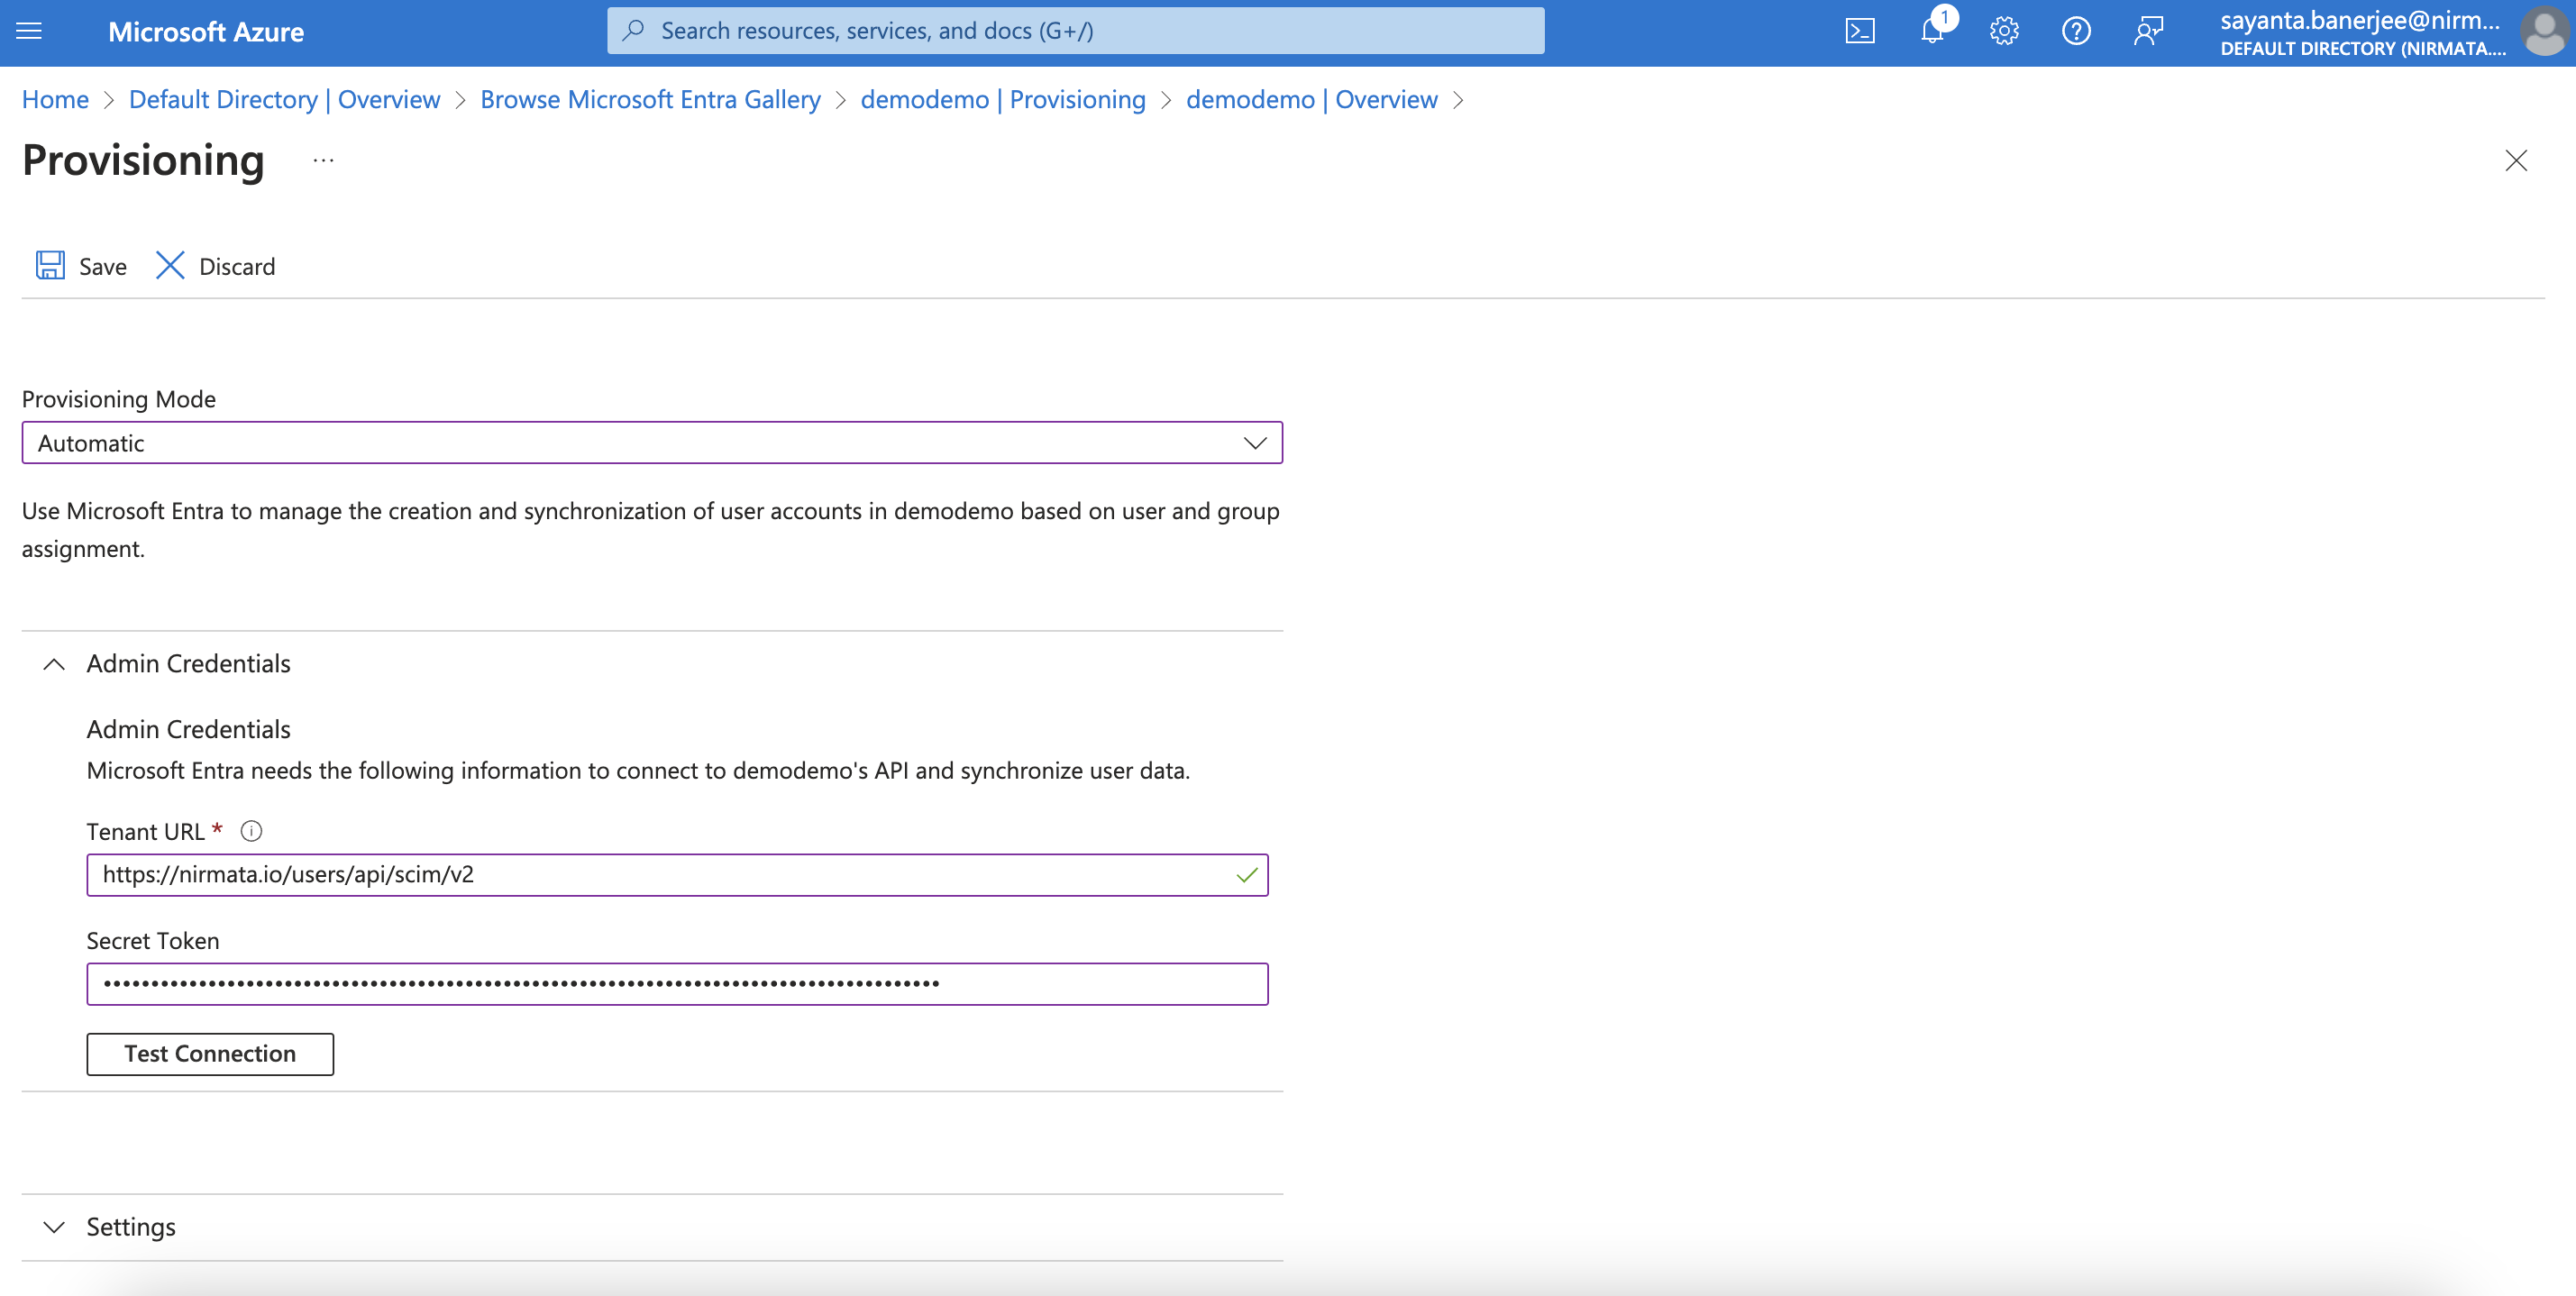
Adding Users and Groups
-
A group must be created to do the provisioning. For that, go back to the Default Directory and click on Groups under Manage to view the list of groups available for your organization.
-
Click on the New group button to create a new group and assign users in it. To do so:
a. The default Group type is set to Security. If not, select the Group type as Security from the dropdown.
b. Enter the group name.
c. The Membership type is set to Assigned by default. If not, select the Membership type as Assigned from the dropdown.
d. You are the default owner of the group. Select any other owners of the group by clicking onNo owners selectedunderOwners.
e. Click on the checkbox beside the users you want to select as owners and then, click onSelect.
f. Assign members to the group by clicking onNo members selectedunderMembers.
g. Click on the checkbox beside the users you want to select as members and then, click onSelect.
h. Click Create.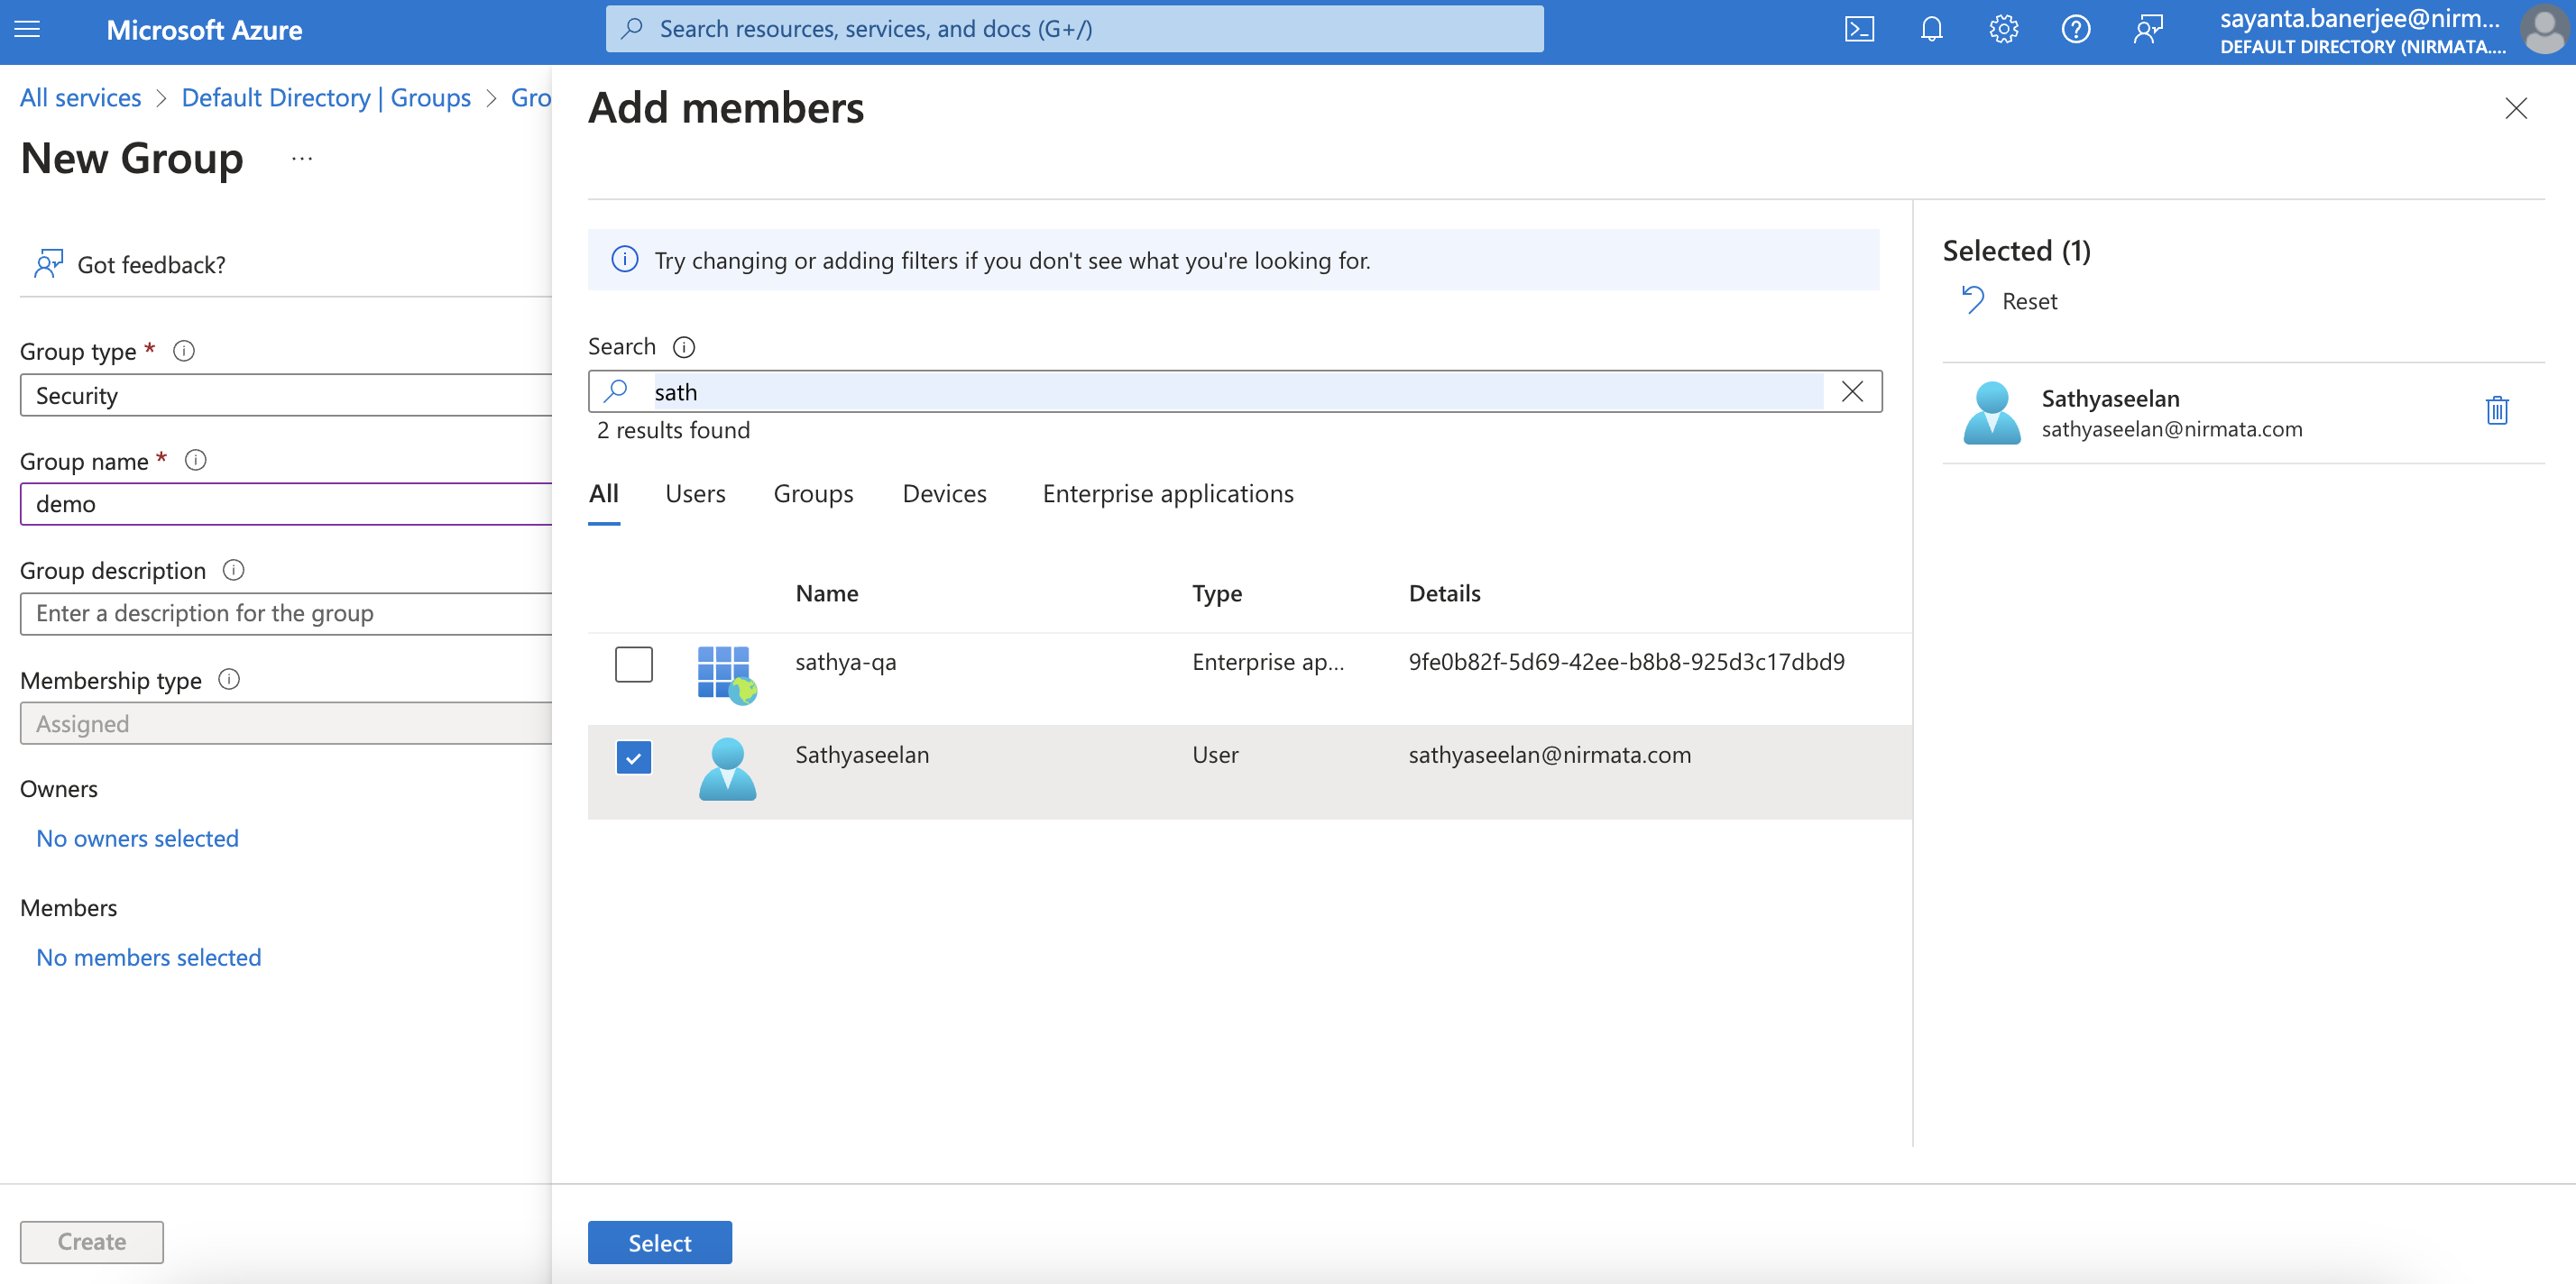
-
After creating the group, go to the application created earlier and click on the Assign users and groups for adding the created group to the application.
-
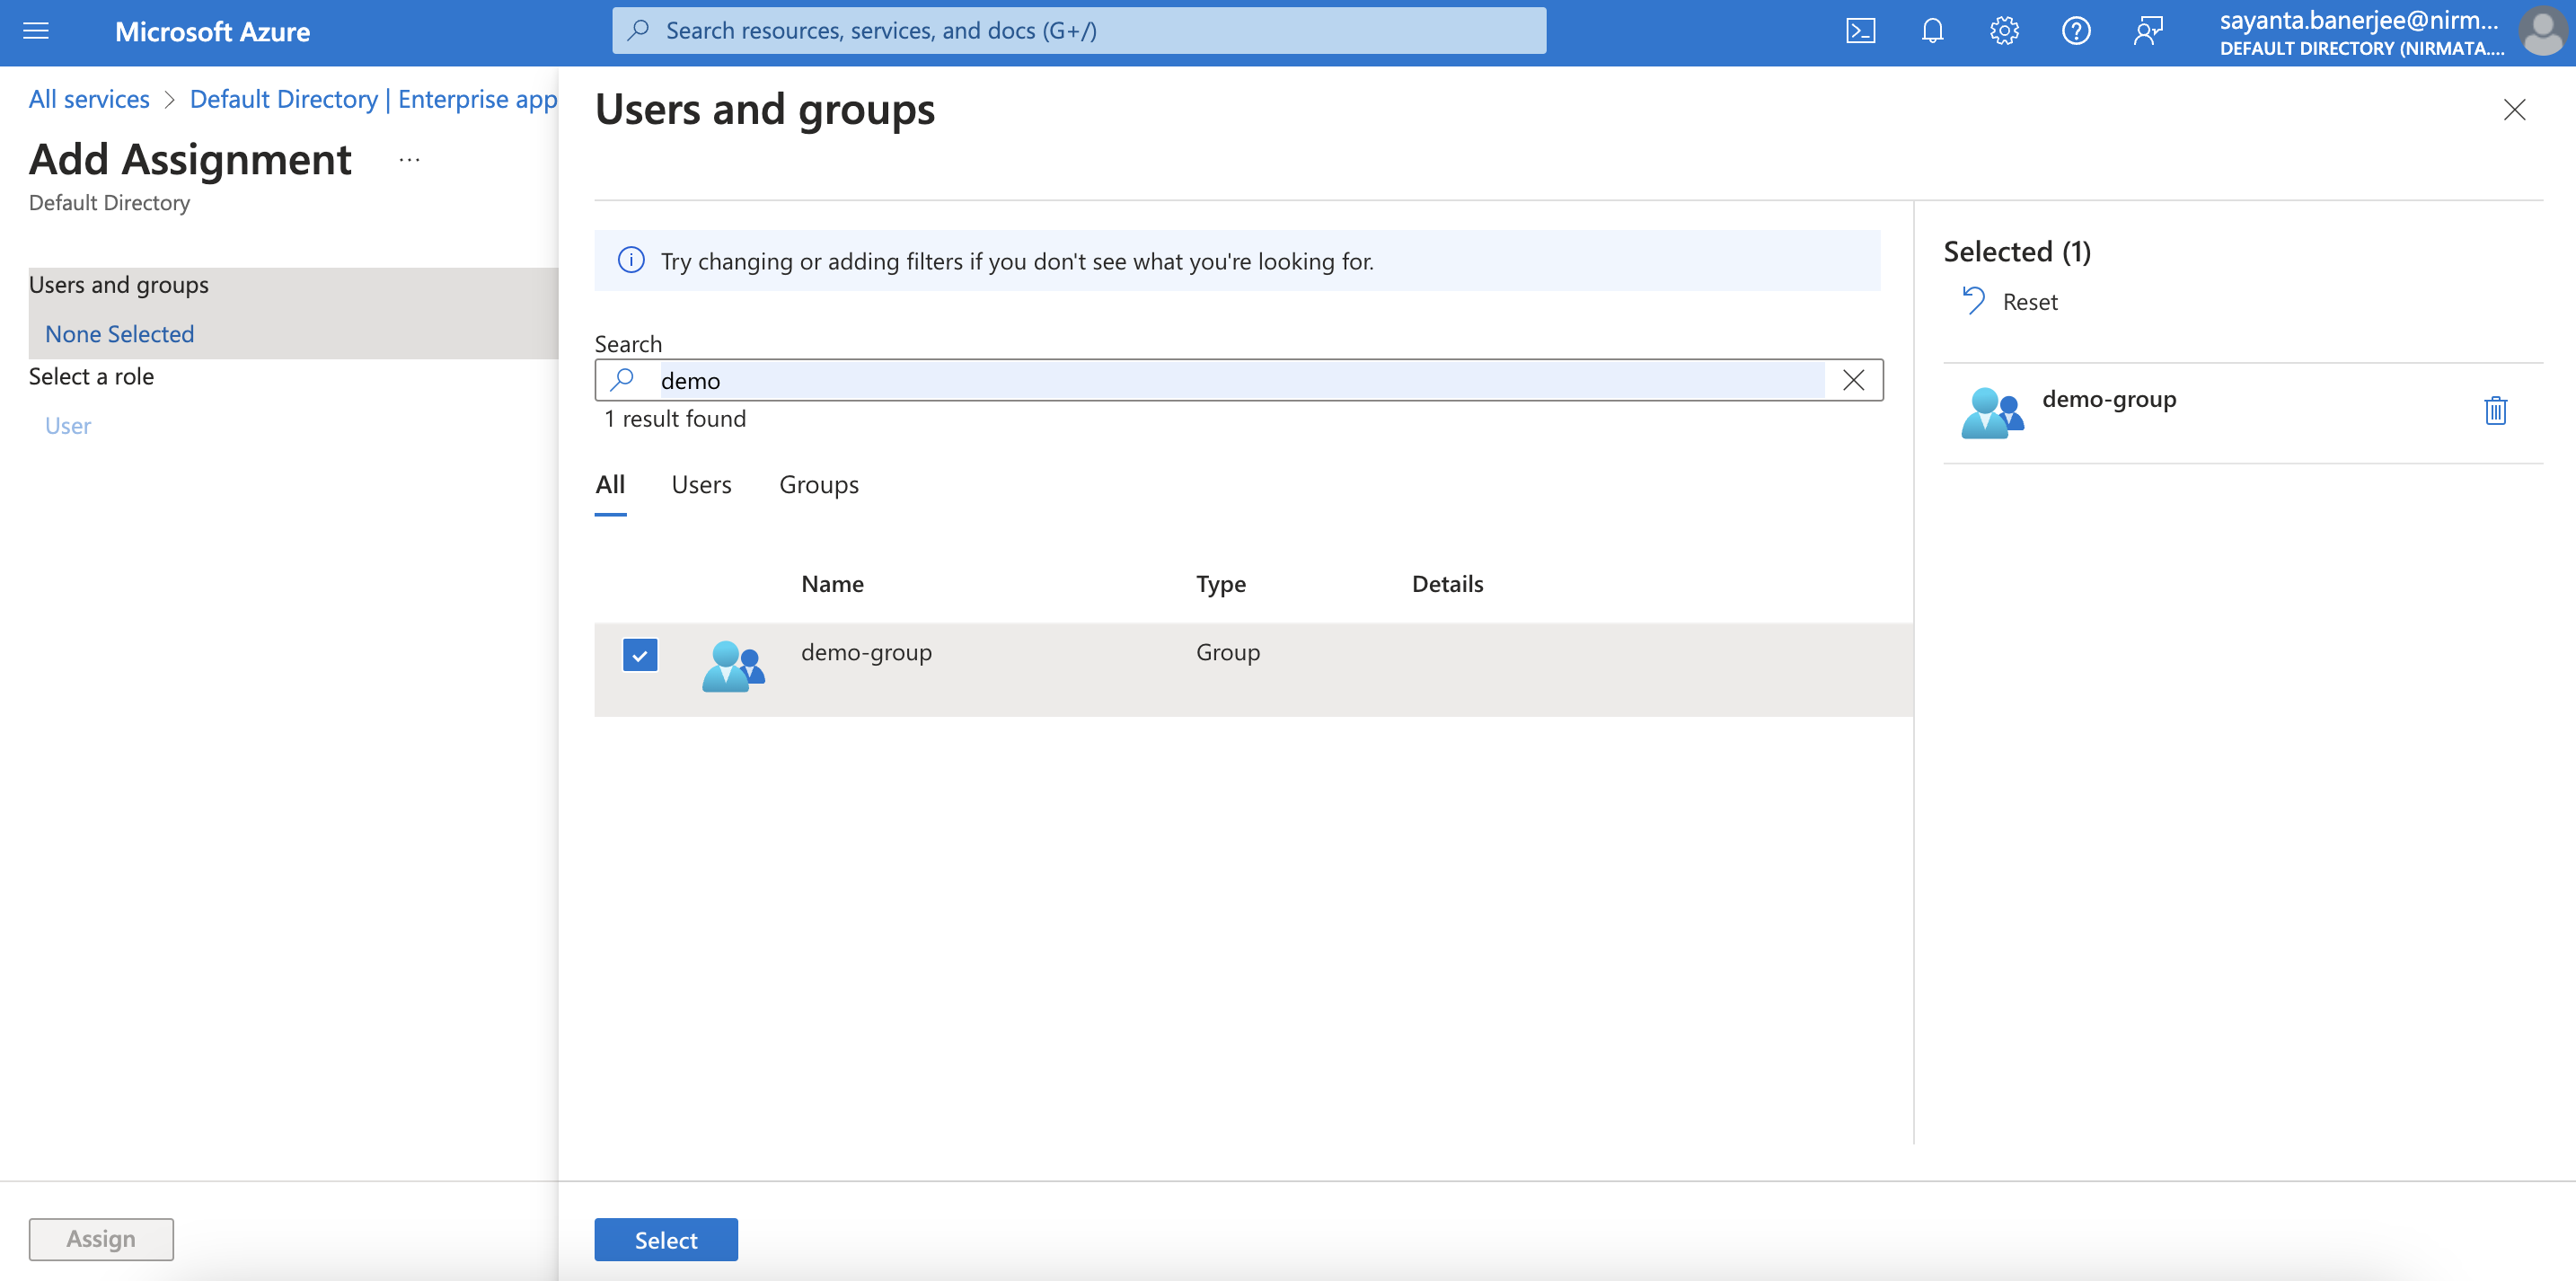
Click on the Add user/group button on the top. The
Add Assignmentpage opens. -
Select the created group by clicking on
None SelectedunderUsers and groups.
a. Search the newly created group.
b. Next, click on the checkbox beside the group and clickSelect.
c. Finally, click on the Assign button to add the group into your application.
Provisioning Users and Groups
- After creating the group and assigning it to the application, click on the Provisioning tab under Manage on the left to open the overview page for provisioning.
- Then, click on the Provision on demand button on the top. The Provision on demand page opens.
- Search the created group by typing the group name within the search bar and select it from the dropdown.
- After that, click on View Members only to select the members of the group for provisioning.
a. Click on the dropdown to see the full list of members of the group.
b. Next, click on the checkbox to select a particular member.
c. The members outside the group can be selected for provisioning the same way by clicking on View all users.
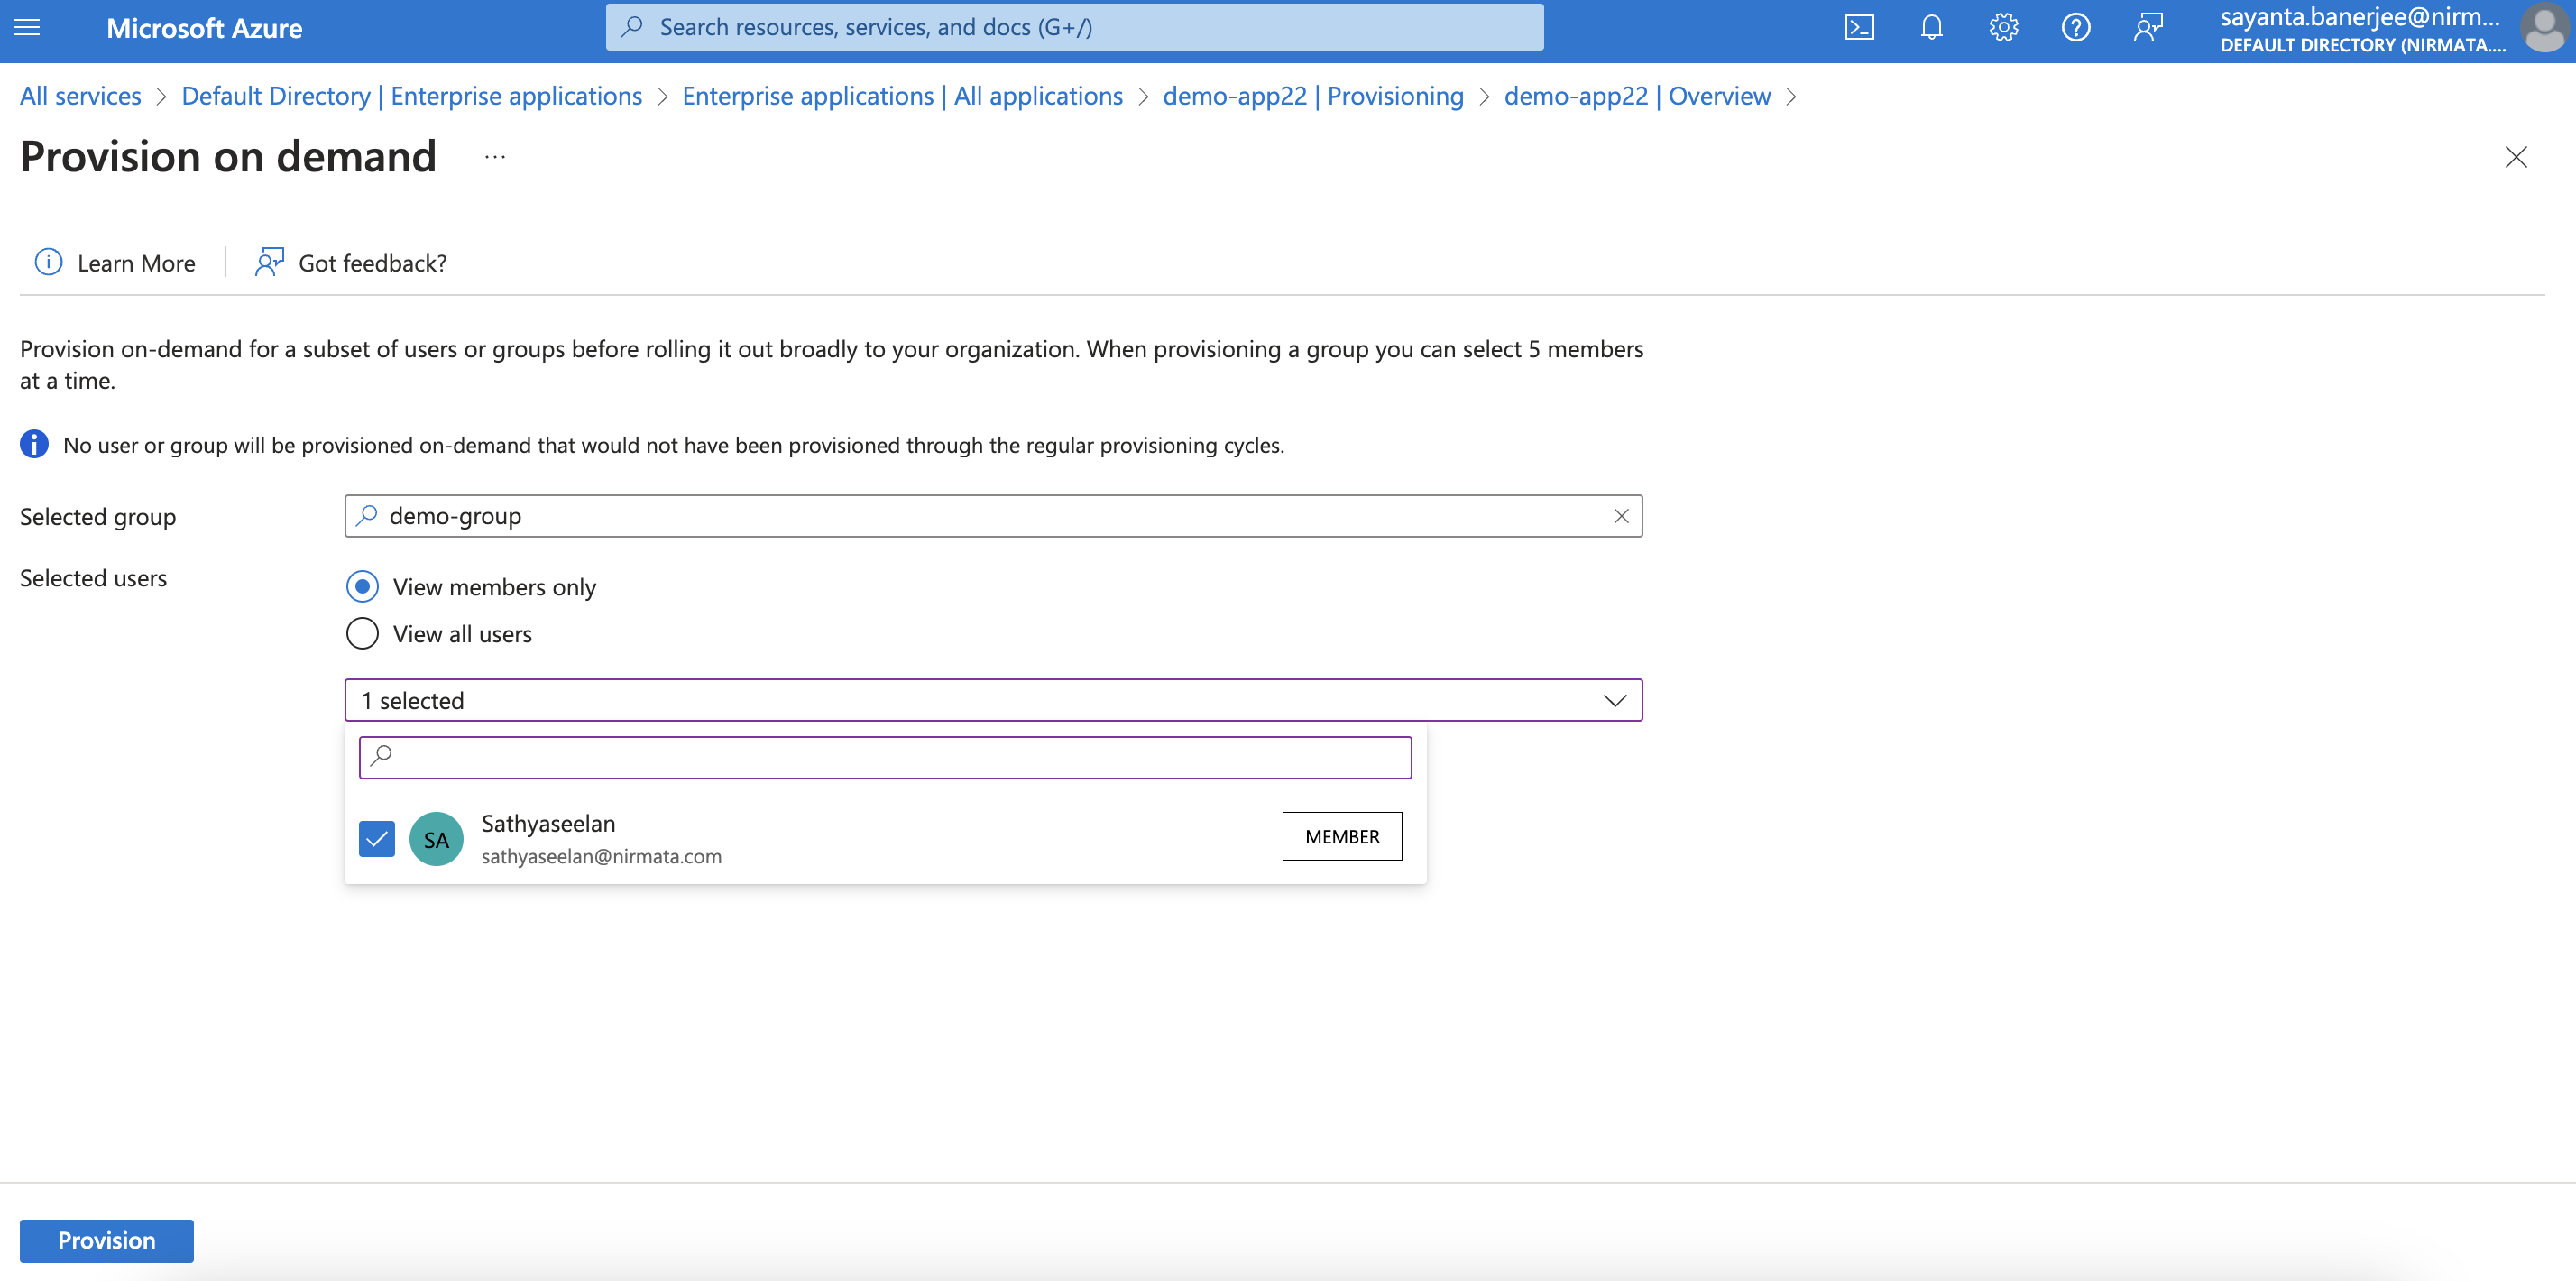
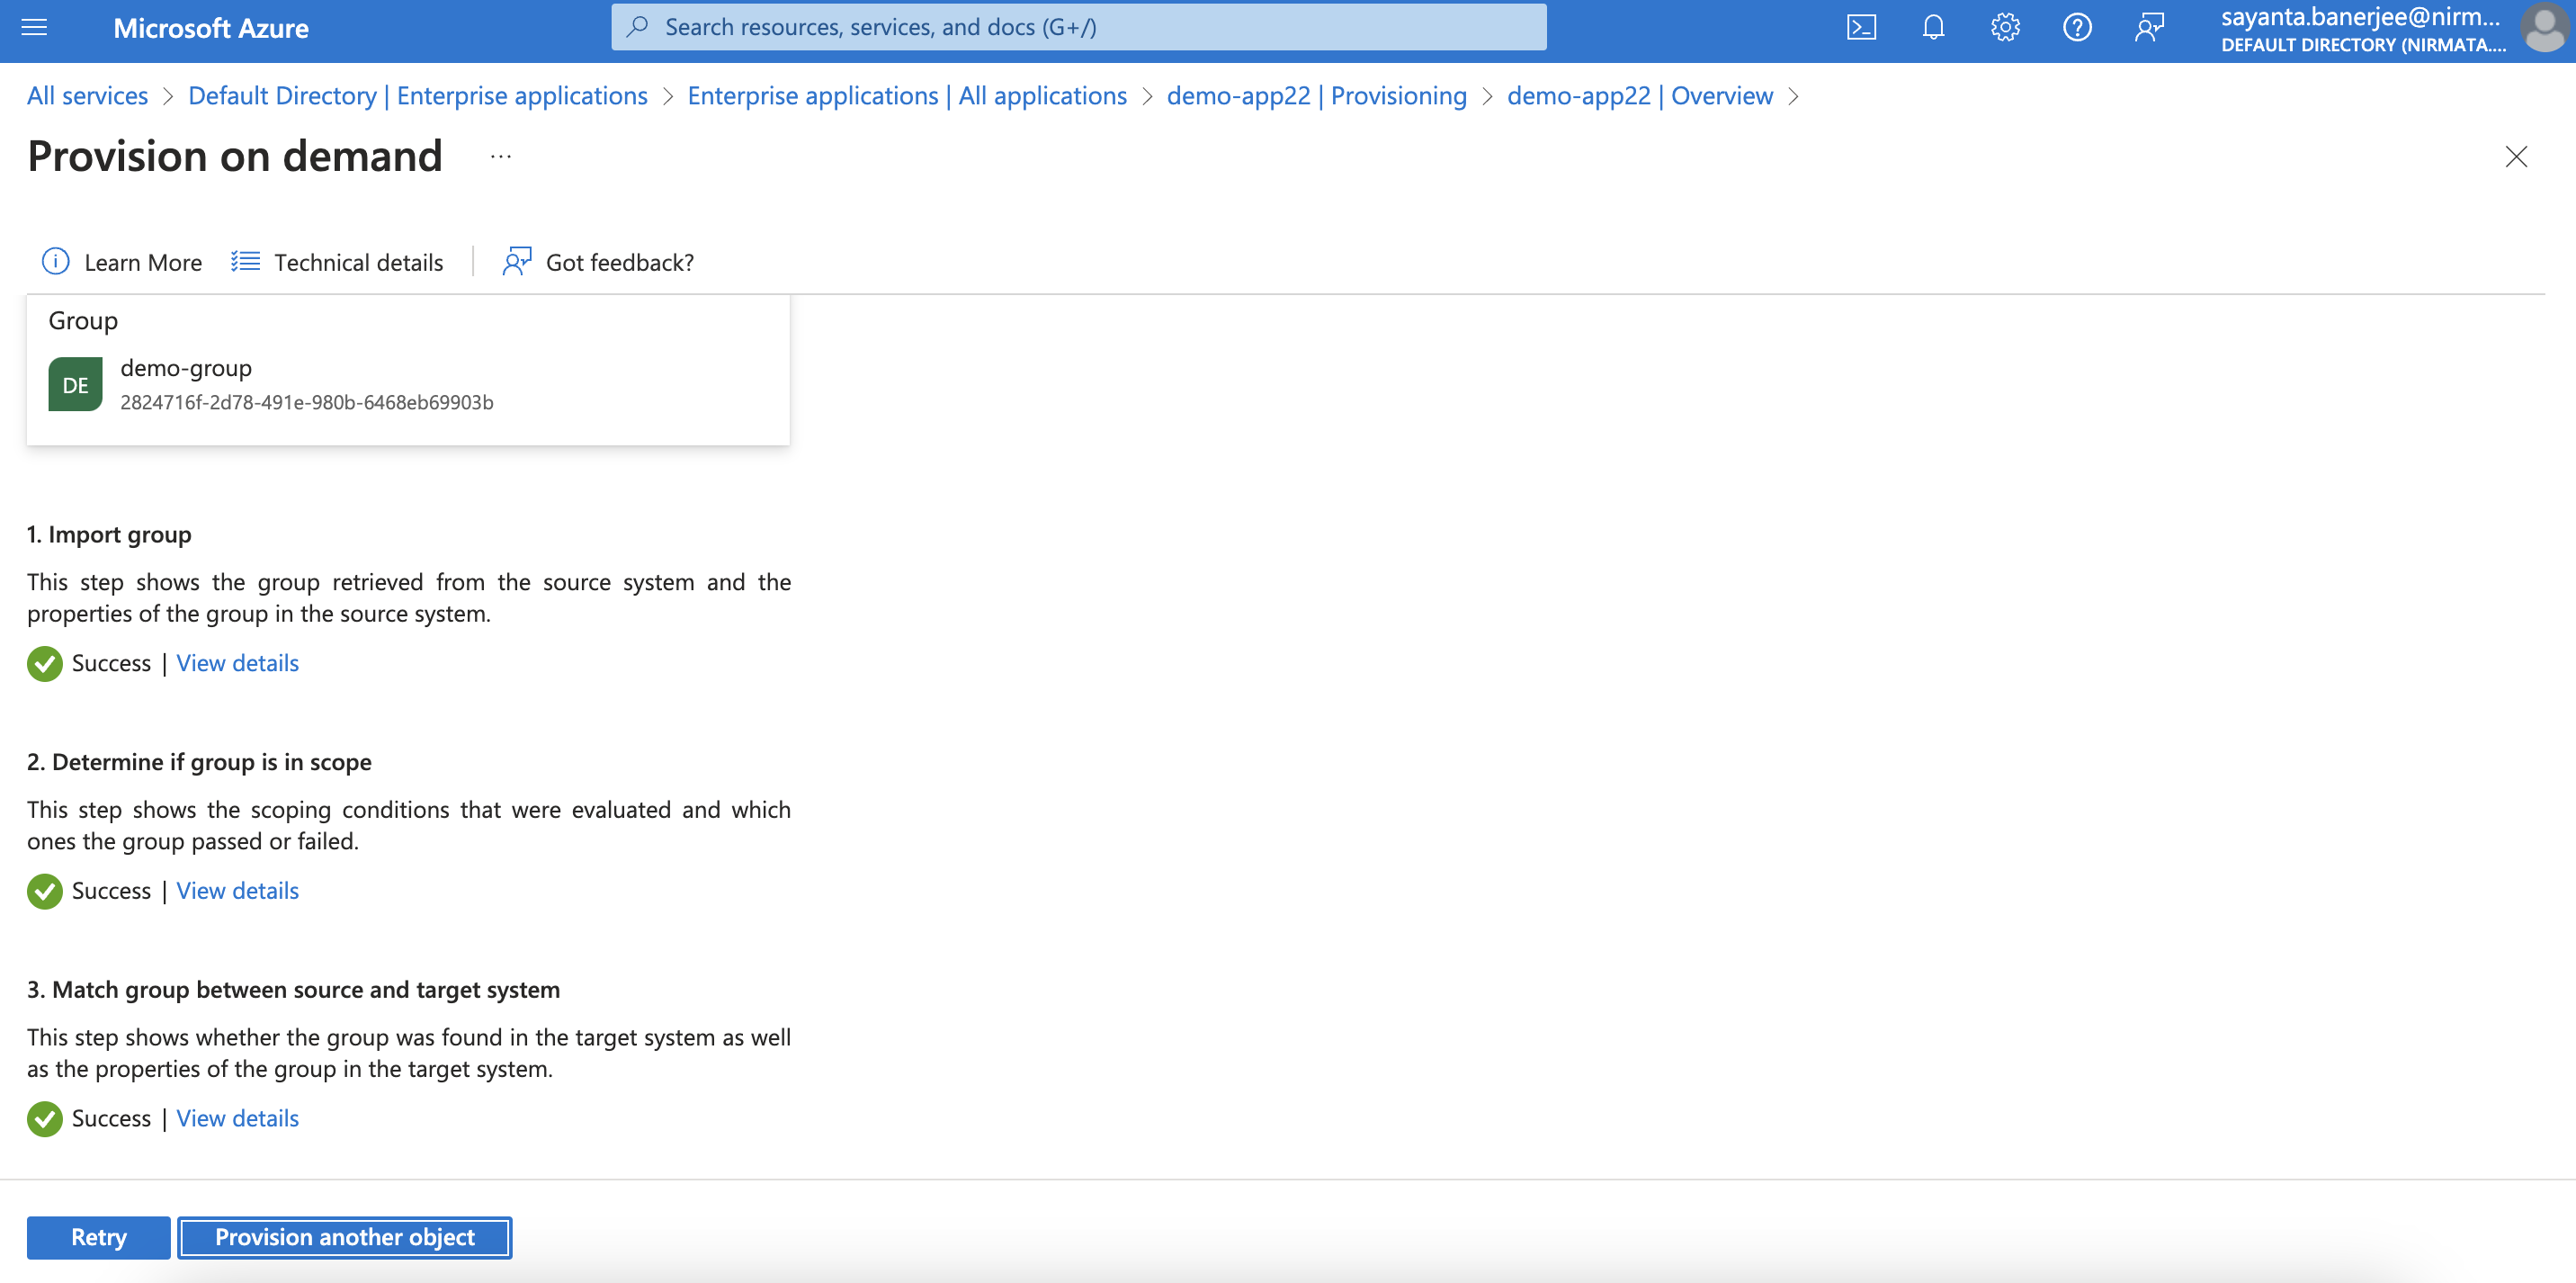
- Finally, click Provision to start the provisioning. The provisioning once completed will show a completion page with all the details.
- To verify team and user sync in NPM, login to NPM and go to Identity & Access>Users and Identity & Access>Teams to verify user and team creation and user membership. By default, all users will be created with the DevOps role.
NOTE: The users created as part of the AD sync will by default have SAML login enabled. The initial Role assigned in NPM is
DevOps. Once the user logs in, only then the mapped Role in AD will take effect.